
Friday, February 27, 2015
Custom Graphics Name

Monday, February 9, 2015
Maya Tools


When making the cups I used NURBS, curve and revolve tool. NURBS create curves and surfaces in a shape. To create a cup I used the CV curve tool in the bottom left perspective and made half of an outline of a cup. Then I used the revolve tool to make it a surface.

Tuesday, February 3, 2015
The Kerning Game

Kerning is the spacing between two letters which you can change to make words, sentences, and paragraphs look better.
Thursday, December 11, 2014
Postcards

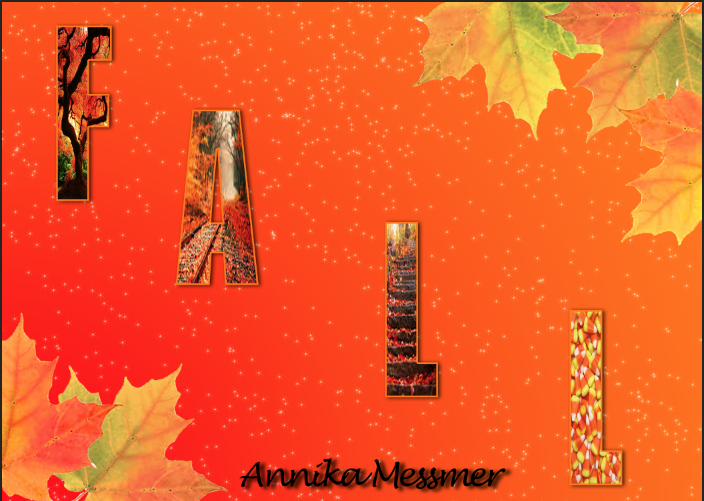 I really enjoyed doing these and had a lot of fun creating my own postcards. Designing them as well as doing them to be what I think is best really helped me get in touch with my creative side. I really did that with my Christmas card because I didn't follow any tutorials and got a little inspiration from another postcard that I saw. I also think It is the best looking one. The other two postcards had a tutorial that I followed. For the fall one I used a tutorial to put the pictures in the letters using a clipping mask. For my personal postcard I used the knowledge from the fall card to make my name. However, the background was from a tutorial that I found online which used Gradients and Gradient Overlay. I also redid my logo because the one I had before looked awful and I didn't think it represented me. As for my brand i'm really not sure what it is. But I think I need to learn a bit more about what a brand is before I know what mine is.

Saturday, December 6, 2014
Serpent Character
My character is a serpent creature. I designed her this way because I though it would look cool.

The tail was a bit of an issue in thinking of how i would make it move across the screen. I didn't really have any issues with the key frames except figuring out how to move the body from one side of the screen to the other. When creating the key frames for the tail I positioned it how I wanted using the puppet tool and put in a key frame. I positioned the tail every second. Since I didn't have to time each step it was a lot easier to animate.

I learned how to use the puppet tool to make the tail wiggle and I learned how to use the puppet starch tool to make part of the tail stiff. And again thinking of how the tail would move the body across was kind of an issue. If I could redo anything I would make it slower. But I feel that I did ok considering i'm new to animation.
Thursday, November 20, 2014
The Chase
In my animation there is a girl on a mars like planet being chased by a big black dog and to get away from the dog she jumps into the water.
When I first thought of this it was actually just the girl running then jumping into the water but then I needed to add a plot so I added the dog so there was a problem and a solution. Before I added the dog I had already plotted out the scenes in a storyboard. One of her running through my multiplane background, which I had already made in a previous project. Then a worms eye view shot of her jumping off the cliff and after that a side view of her falling into the water. Finally, I added the dog to the scenes. I drew my characters and scanned them in. To give them color and shadows I used Photoshop. After that I put them in After Effects and put the anchor point in place. Then I added the key frames and rotation key frames to make the running scene. Which took forever! Then I added the the backgrounds that I made in Photoshop as well as the other views of the characters and put in their key frames. I also put in a splash that I had to move around a bit. Finally I went back through it and made little adjustments to my animation like making the characters in the running scene bounce when they run.
While working on this animation I learned a few things. I learned how the tabs at the top of the view work and what they do. I also learned about meeting deadlines and how you should try to spread out your focus so you don't spend forever on one single thing.
If I had to do this again I would change the dog into a dark cloud or something for a few reasons. One it would be sooooo much easier to animate not to mention it would probably look a lot better and two it would be a bit easier to draw and color. If I could keep something the same it would be the background and girl because I like the way they look and how I made them.
I will use what I've learned during this animation by spreading out my focus and planning things all the way through to make sure I like what i'm going to get. But overall I think I did an ok job even though I would change a few things about it. This was pretty fun to do even if it was a bit frustrating at times.
When I first thought of this it was actually just the girl running then jumping into the water but then I needed to add a plot so I added the dog so there was a problem and a solution. Before I added the dog I had already plotted out the scenes in a storyboard. One of her running through my multiplane background, which I had already made in a previous project. Then a worms eye view shot of her jumping off the cliff and after that a side view of her falling into the water. Finally, I added the dog to the scenes. I drew my characters and scanned them in. To give them color and shadows I used Photoshop. After that I put them in After Effects and put the anchor point in place. Then I added the key frames and rotation key frames to make the running scene. Which took forever! Then I added the the backgrounds that I made in Photoshop as well as the other views of the characters and put in their key frames. I also put in a splash that I had to move around a bit. Finally I went back through it and made little adjustments to my animation like making the characters in the running scene bounce when they run.
While working on this animation I learned a few things. I learned how the tabs at the top of the view work and what they do. I also learned about meeting deadlines and how you should try to spread out your focus so you don't spend forever on one single thing.
If I had to do this again I would change the dog into a dark cloud or something for a few reasons. One it would be sooooo much easier to animate not to mention it would probably look a lot better and two it would be a bit easier to draw and color. If I could keep something the same it would be the background and girl because I like the way they look and how I made them.
I will use what I've learned during this animation by spreading out my focus and planning things all the way through to make sure I like what i'm going to get. But overall I think I did an ok job even though I would change a few things about it. This was pretty fun to do even if it was a bit frustrating at times.
Monday, November 10, 2014
Snail Shadow

In this tutorial I learned how to make a realistic shadow. First I chose an image, in my case a snail, then I selected it by using the magnetic marquee tool. After that I put it in the background of my choice, wood chips, by dragging and dropping. In order to make the shadow I followed the tutorial and made a layer copy. Then I used the transform tool and stretched it to take the form of a shadow. I made it a black to white translucent gradient to make it look like a shadow but since that didn't correspond with the background so I used the eyedropper tool to replace the white with a tannish color. Since the shadow didn't quite mach up with my snail I used the puppet warp to get it connected to my snail. Finally I used the burn tool to blend the background and snail together while adding a shadow as well.
Subscribe to:
Posts (Atom)